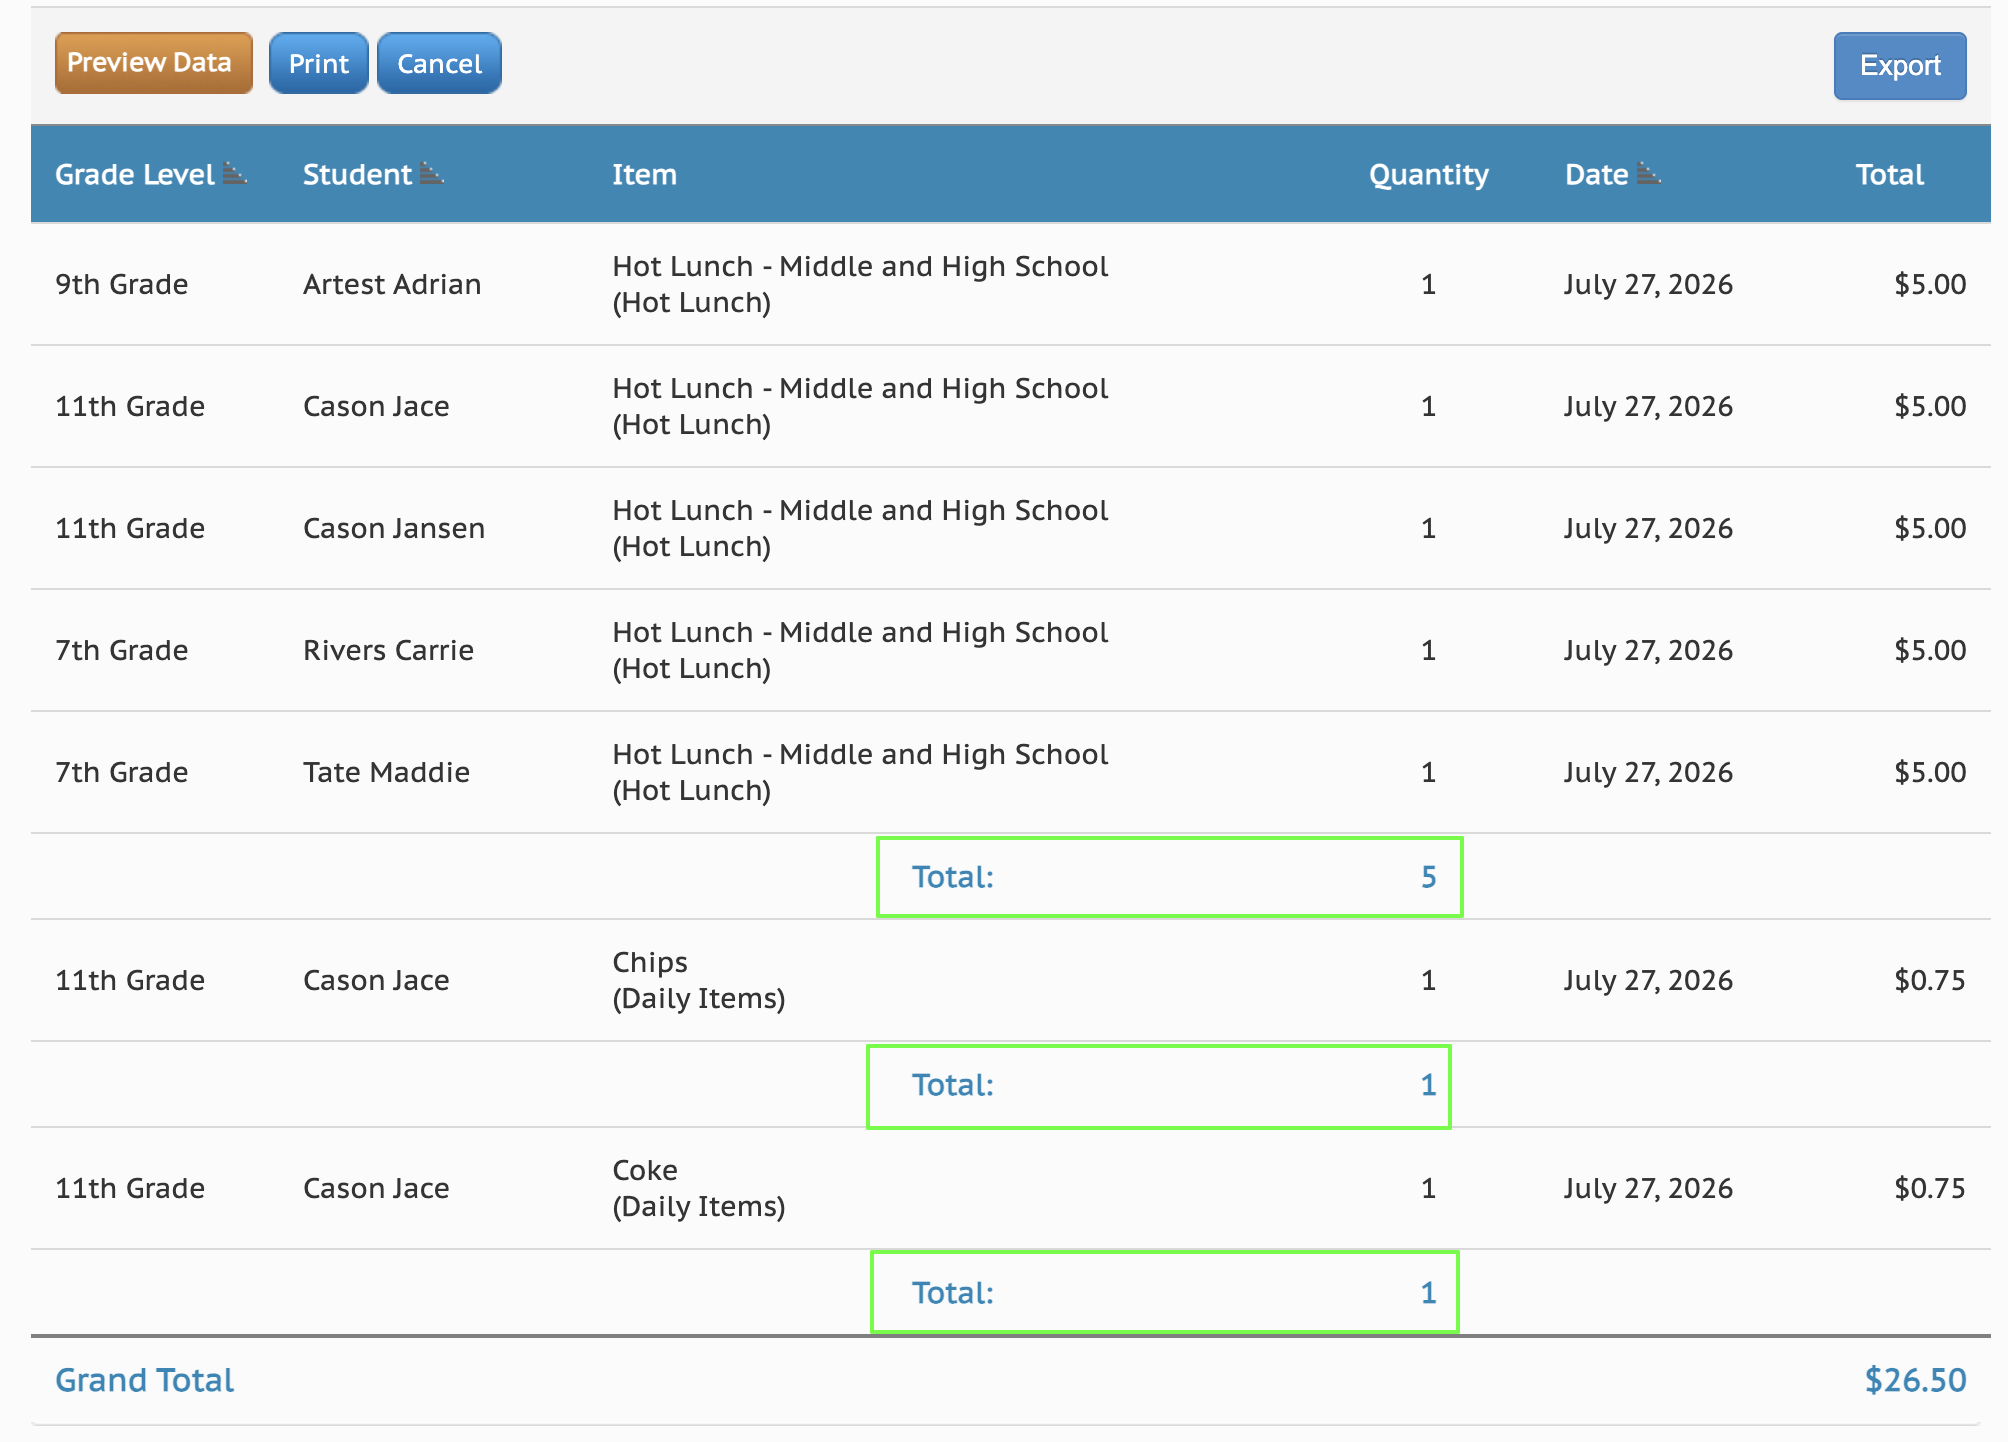
Administrator Guide to Pulling a Lunch Report
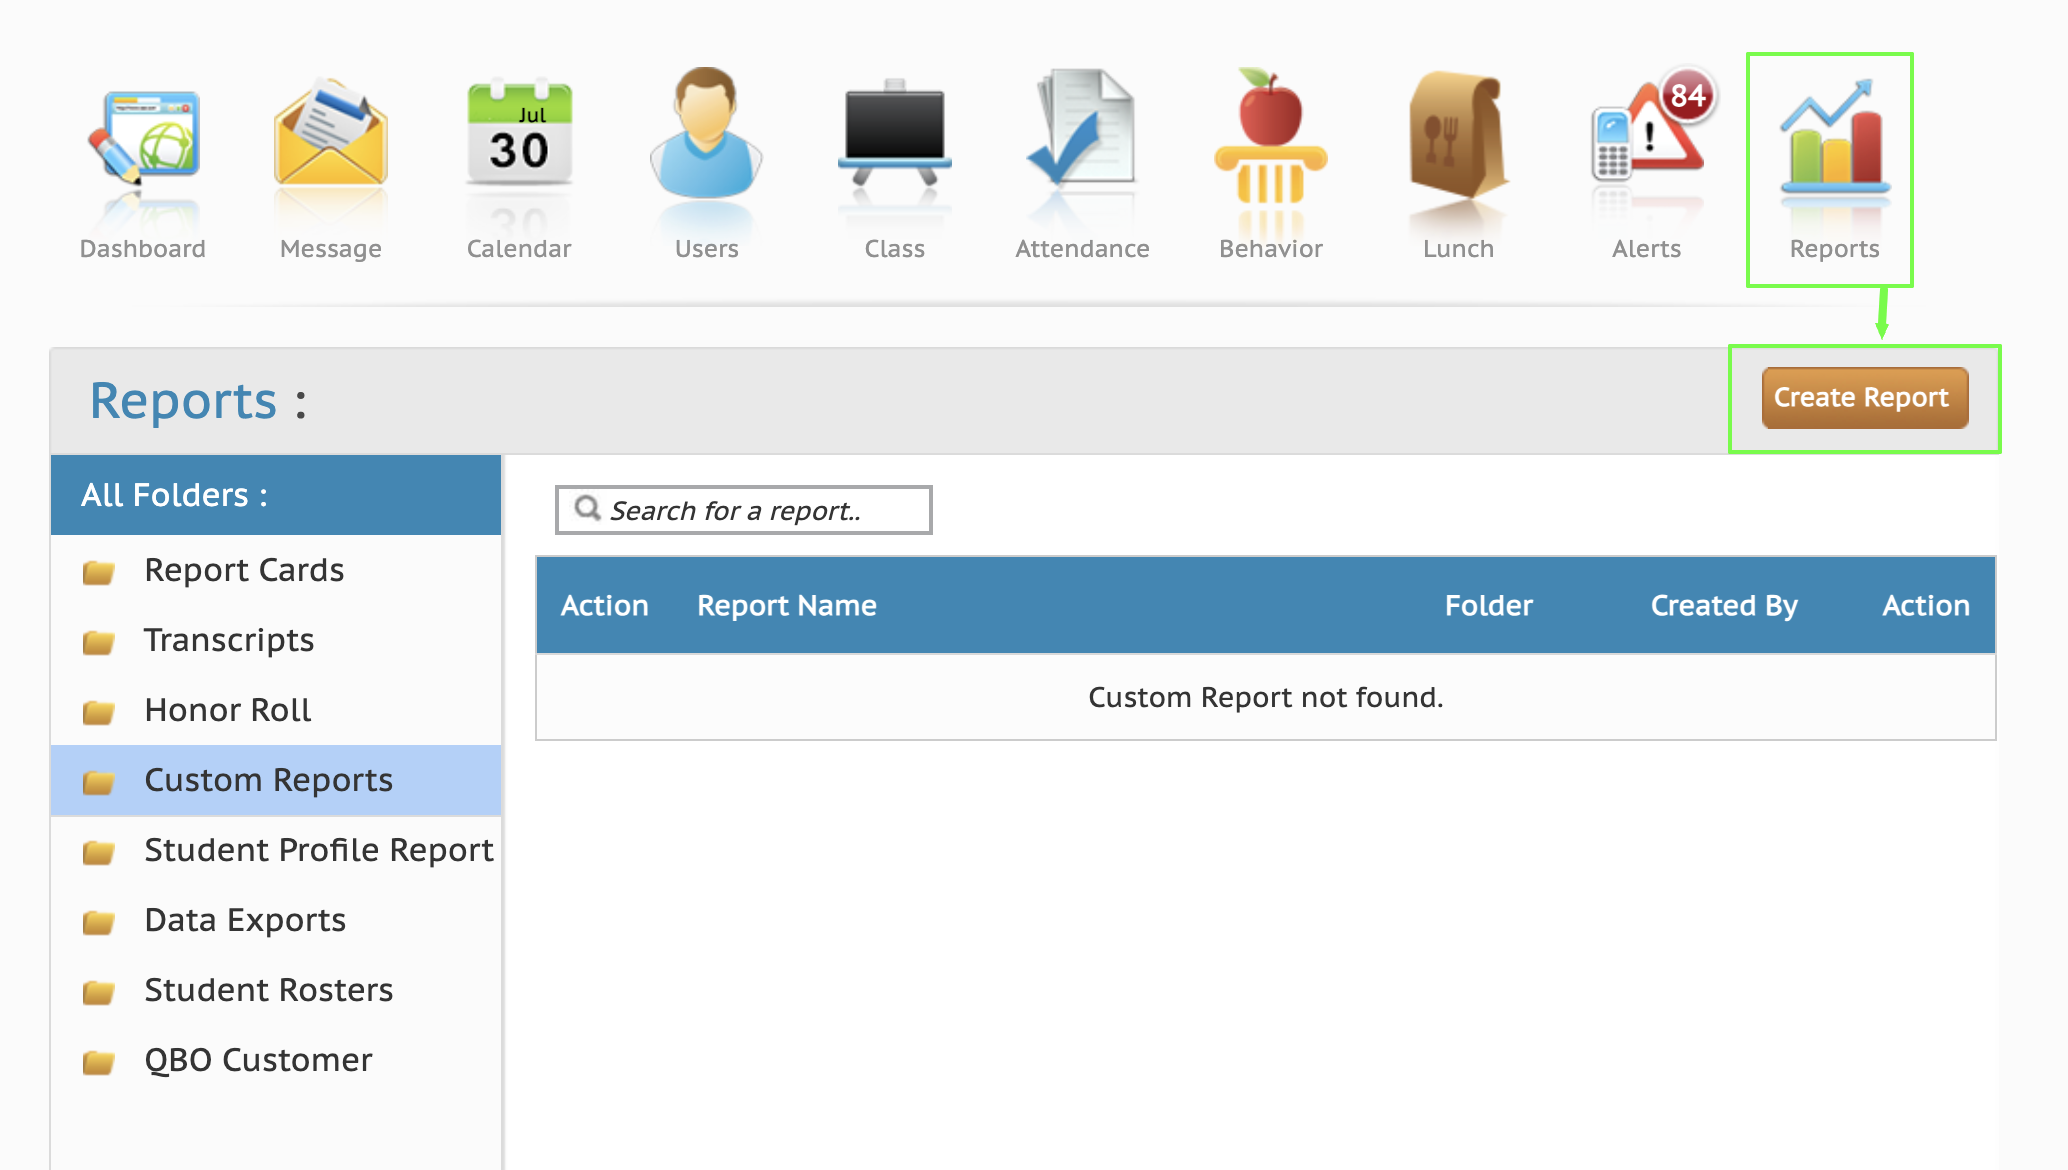
- Click on the Reports icon, then click Create Report
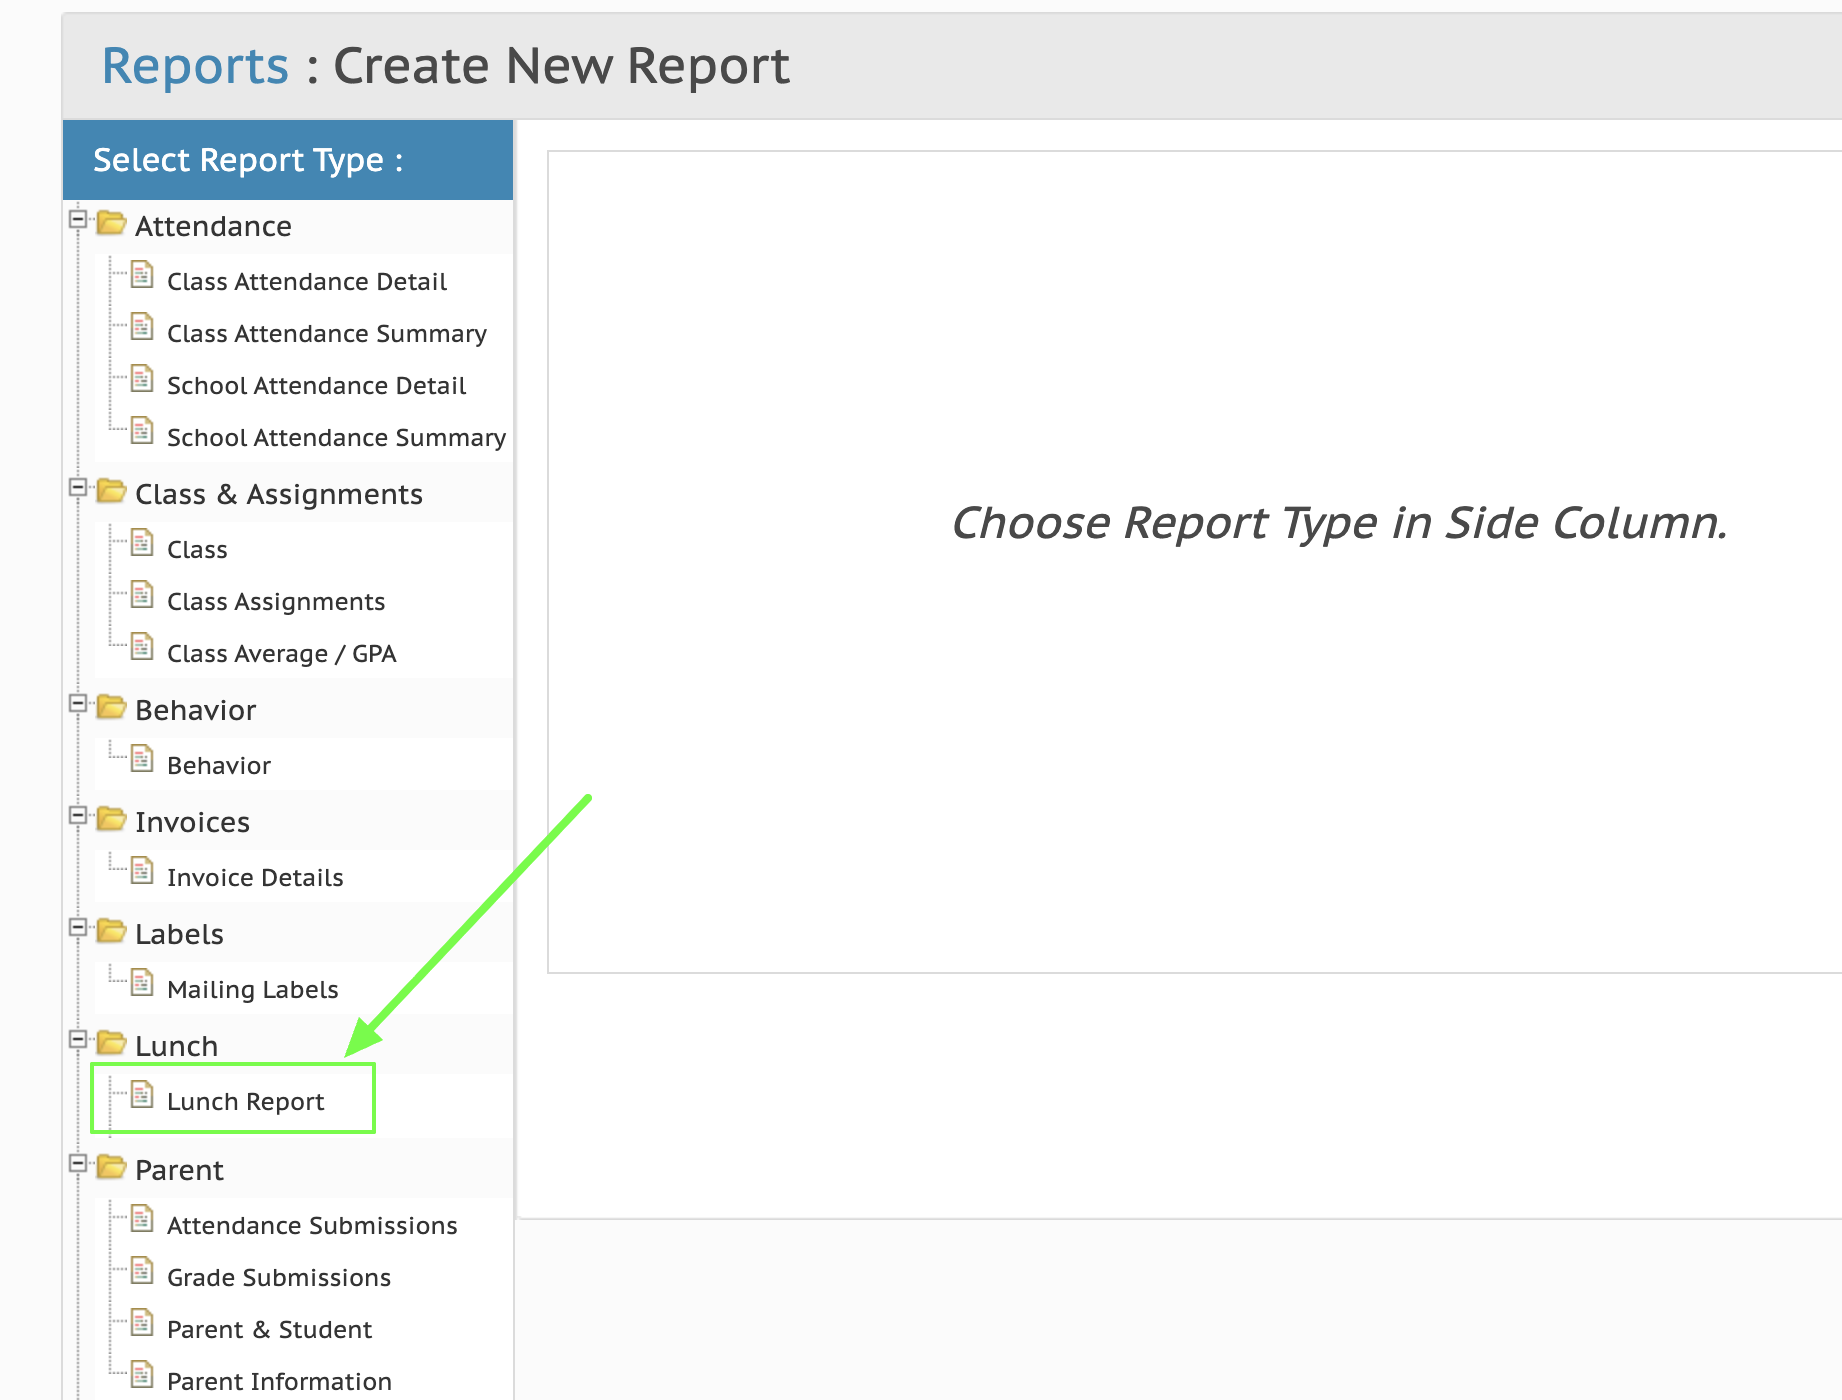
- Under Select Report Type, click Lunch Report
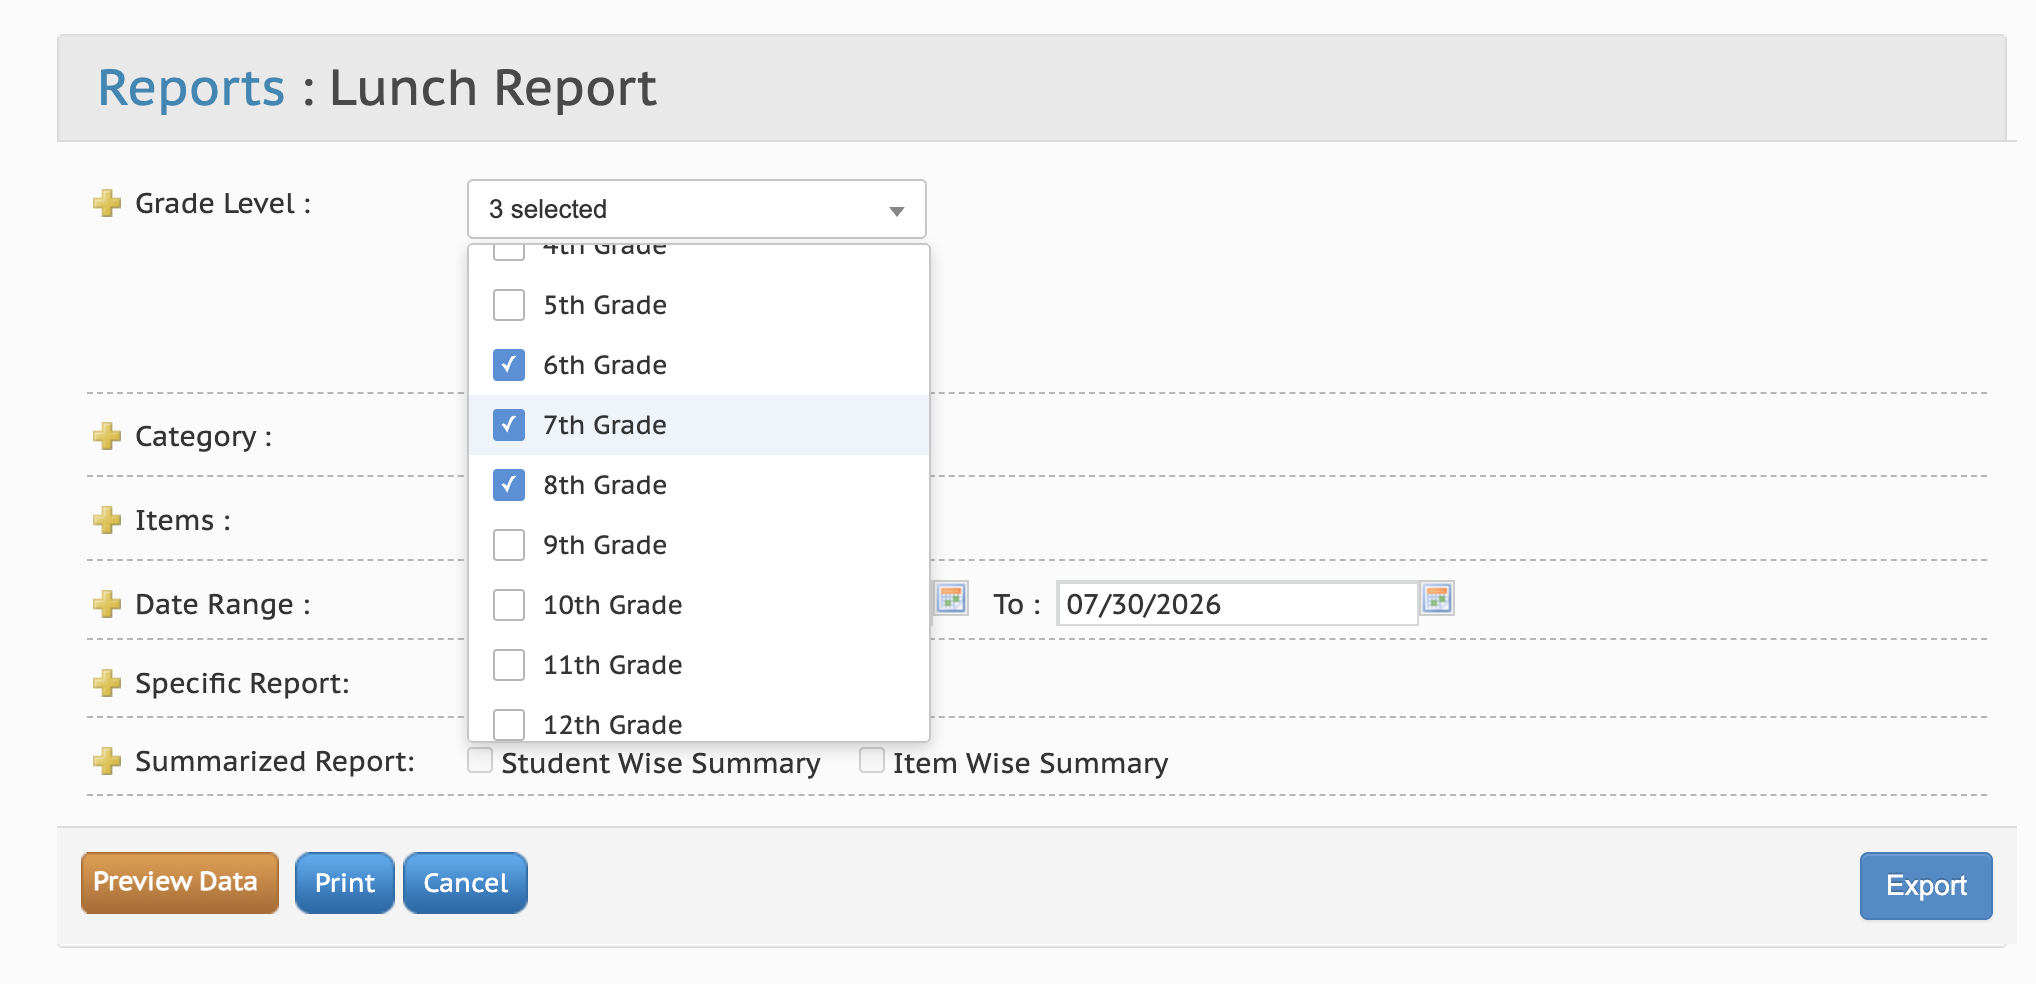
- Grade Level Filter
- If you want to include all grade levels in your report, you do not need to change this filter. Leave it on Select.
- If you want to include only one grade level in your report, click the drop down and select that one grade level.
- If you want to include multiple grade levels in your report, click the drop down and select all grade levels you need.
- Category Filter
- If you want to show all categories on your report, leave the drop down selection as ALL.
- If you want to select one category, click the drop down, and select the category you need.
- Items Filter
- This filter works in conjunction with the Category filter. If you leave the Category filter as ALL, the default selection for this filter will be ALL.
- If you selected one Category, then the items within that one Category will show in this drop down. You can either leave the drop down as ALL or select one Item.
- Date Range
- The default will always be the present day.
- Click the calendar icons next to the From and To fields to change the date range for your report.
- Specific Report
- All - the default selection will include both students and staff. (NOTE: If you selected a Grade Level in the first filter, your report will automatically switch to show only the students in those grade levels, and not Staff).
- Students - this option will show only students in your report
- Staff - this option will show only staff in your report
- Summarized Report
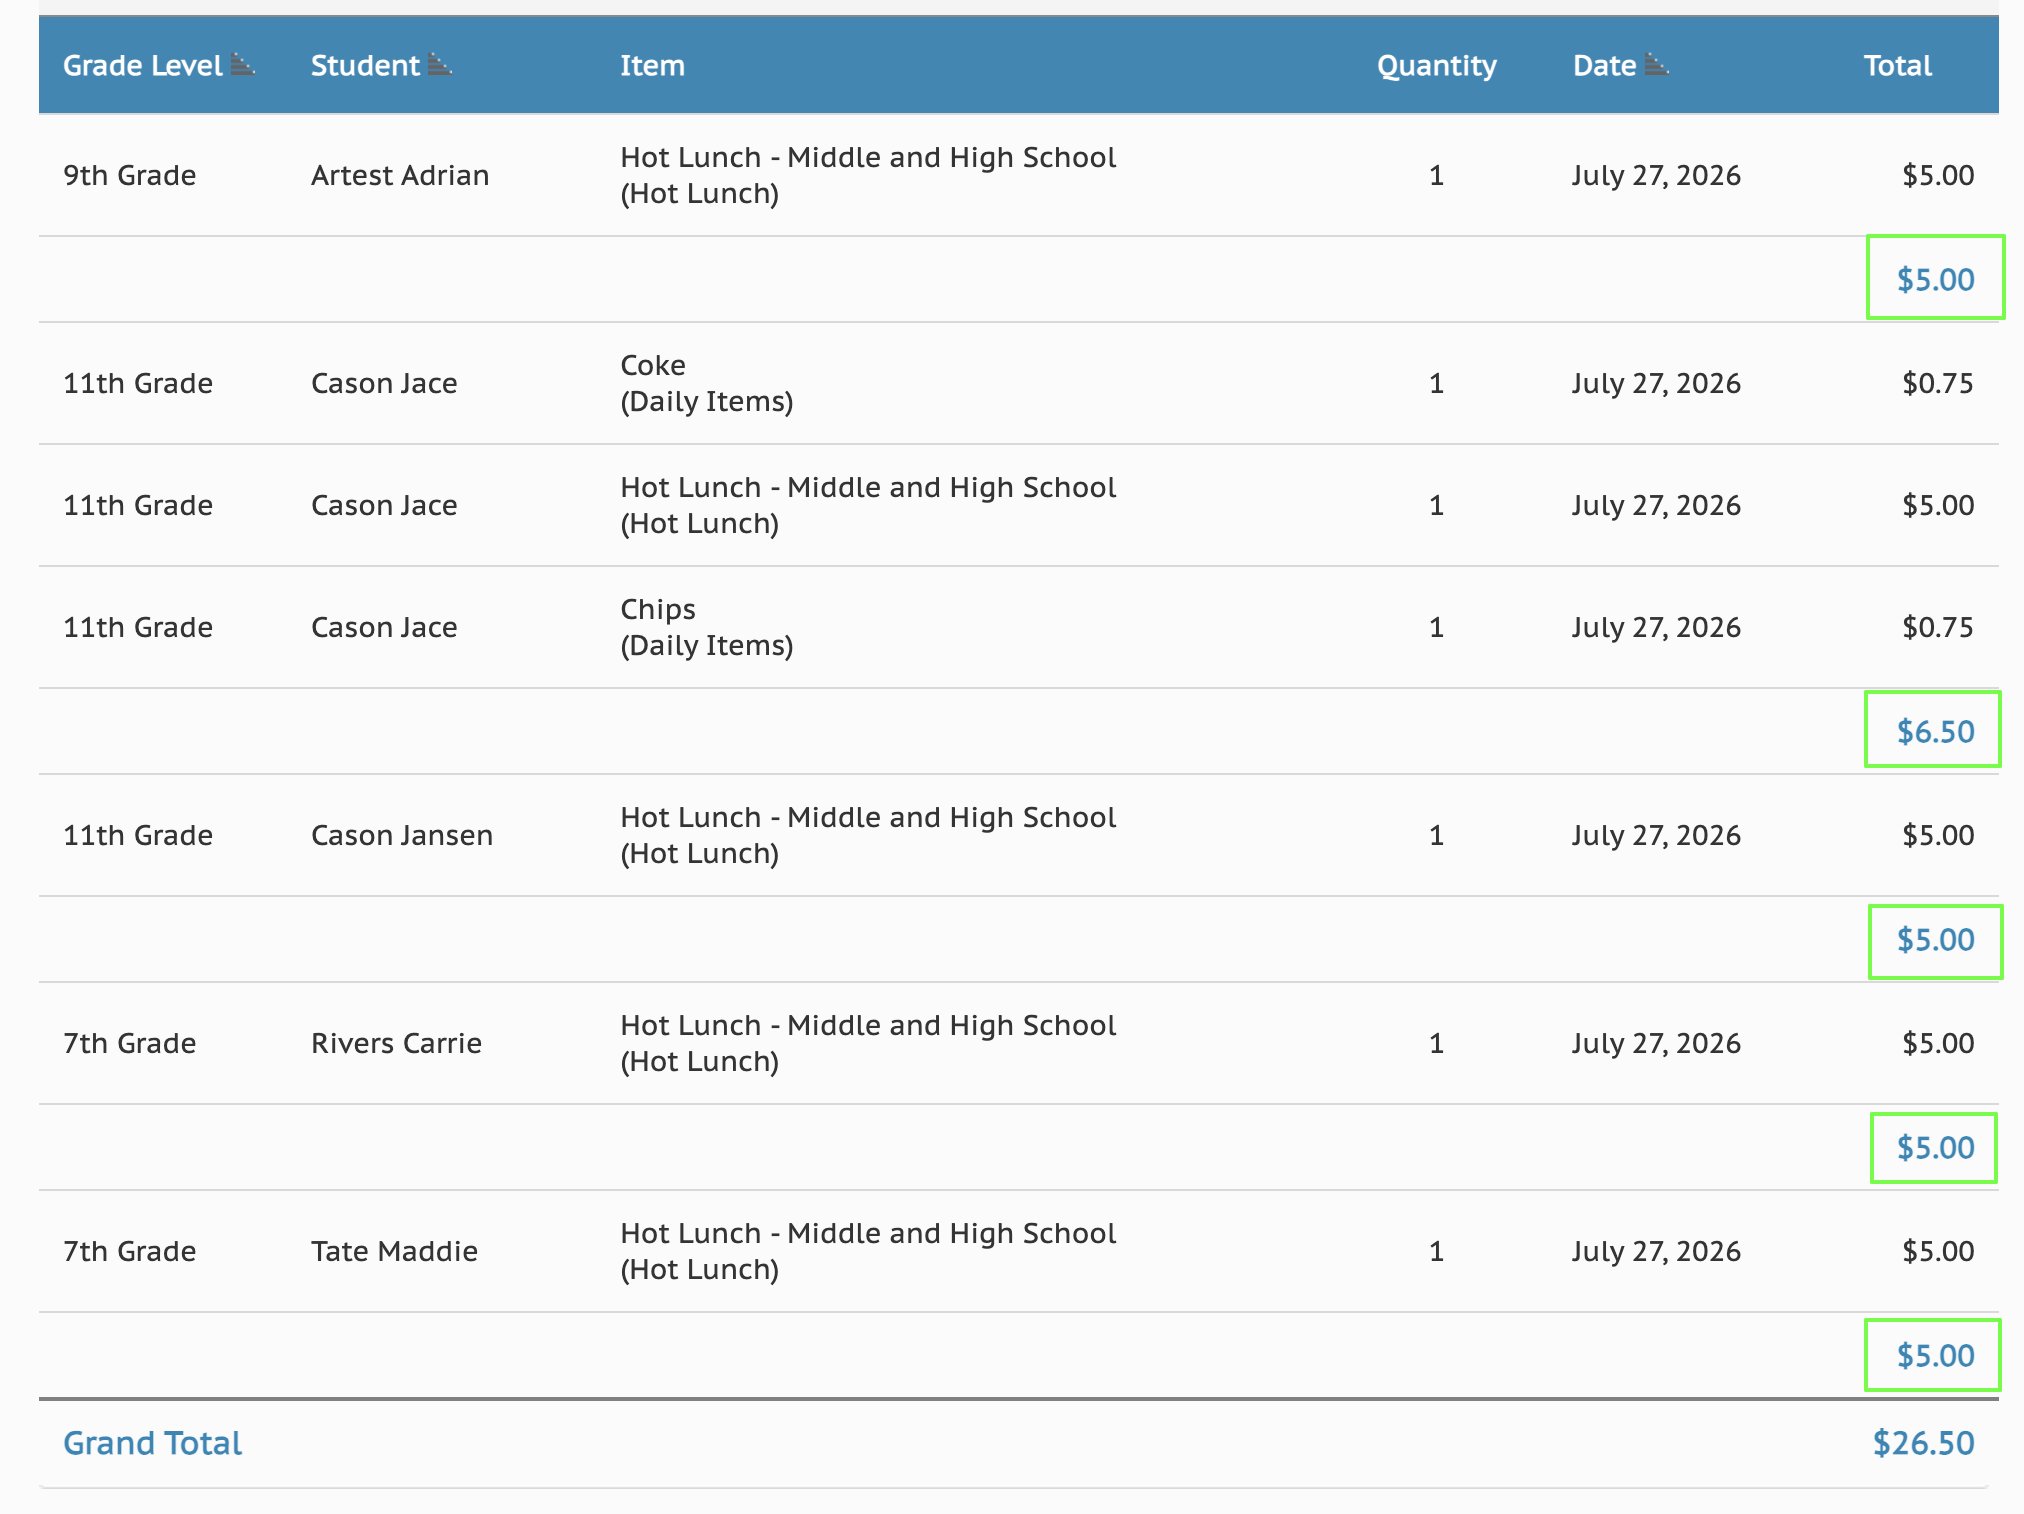
- Student Wise Summary
- This option is enabled if you select the Student option in the Specific Report filter
- This will group your report by student, and give you one total for each student
-
- Item Wise Summary
- This option will group by item, and give you a quantity total for each item, for inventory purposes.
-